


What is Git?
Git is a free and Open Source version control system (VCS), a technology used to track older versions of files, providing the ability to roll back and maintain separate different versions at the same time.
By far, the most widely used modern version control system in the world today is Git. Git is a mature, actively maintained open source project originally developed in 2005 by Linus Torvalds, the famous creator of the Linux operating system kernel.
GitHub is a website that hosts billions of lines of code, and it’s where millions of developers gather every day to collaborate on and report issues with open-source software.
In short, it’s a platform for software developers, and it’s built around Git
There may be no developer left who use git for deploying their codes or website. In this the developer host public or private. In case of any emergengy when your code has deleted from our computer system .Git plays important role of saving all the work which you add in git.
GitHub, is an Internet hosting service for software development and version control using Git. It provides the distributed version control of Git plus access control, tracking software feature requests, task management, continuous integration, and wikis for every project.
It is commonly used to host open source software development projects. As of June 2022, GitHub reported having over 83 million developers and more than 200 million repositories including at least 28 million public repositories. It is the largest source code host as of November 2021.
Why Github?
Now you have known about Github , then your question must be like why we should only use Github. GitHub, after all, is managed by a private company, which profits from hosting people’s code. So why should you use that instead of similar platforms such as Bitbucket or GitLab?
Beside personal preferences and technical reasons, there is one big reason: everyone uses GitHub, so the network effect is huge.
It's used for storing, tracking, and collaborating on software projects. It makes it easy for developers to share code files and collaborate with fellow developers on open-source projects. GitHub also serves as a social networking site where developers can openly network, collaborate, and pitch their work. so basically we can count the advantages of git hub . Let's learn about some advantages of it.
Advantages of Github:
It makes it easy to contribute to your open source projects
Documentation
Showcase your work
Markdown
GitHub is a repository
Track changes in your code across versions
Integration options
Git is flexible in several respects
Git has the functionality, performance, security and flexibility that most teams and individual developers need.
How to Install Git on Windows:
Git for Windows stand-alone installer
Download the latest Git for Windows installer.
When you've successfully started the installer, you should see the Git Setup wizard screen. Follow the Next and Finish prompts to complete the installation. The default options are pretty sensible for most users.
Open a Command Prompt (or Git Bash if during installation you elected not to use Git from the Windows Command Prompt).
Run the following commands to configure your Git username and email using the following commands, replacing Emma's name with your own. These details will be associated with any commits that you create:
 $ git config --global user.name "Rakhshanda"
 $ git config --global user.email "rakshandashaikh8458@gmail.com"
 // You can check your info by typing
 git config --global --edit
Setting up a new Repository:
A Git repository is a virtual storage of your project. It allows you to save versions of your code, which you can access when needed. Let's Learn how to create a repository.
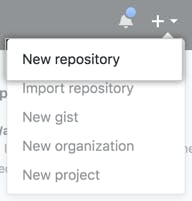
In the upper-right corner of any page, use the + drop-down menu, and select New repository.
Type a short, memorable name for your repository. For example, "hello-world".
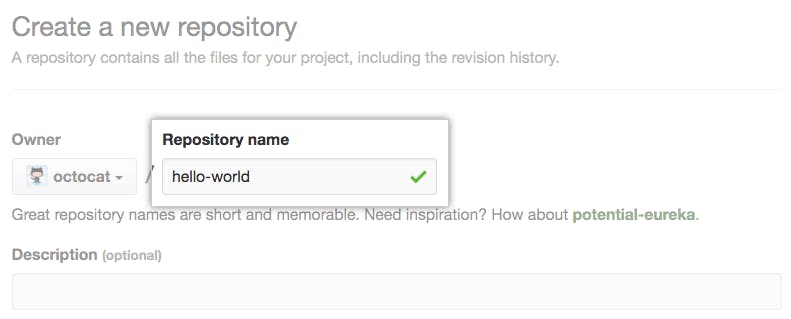
Type a short, memorable name for your repository. For example, "hello-world".
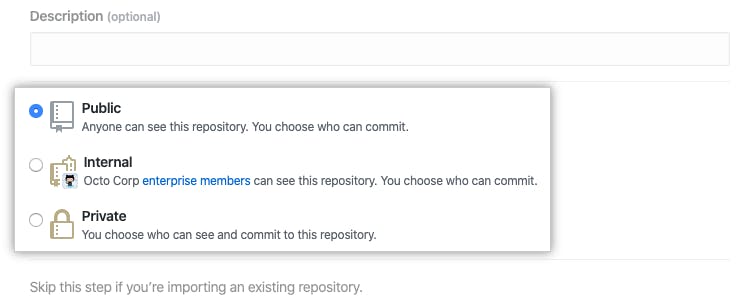
Choose a repository visibility. For more information, see "About repositories."
Select Initialize this repository with a README.
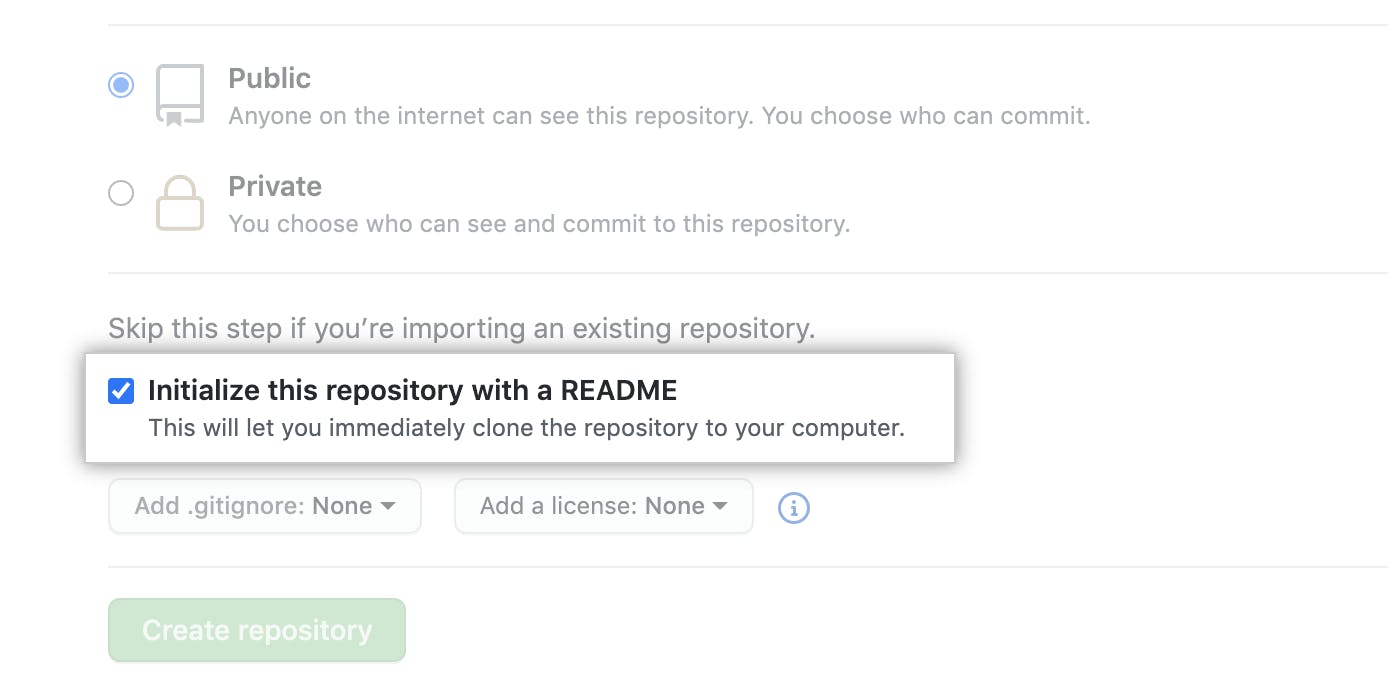
Click Create repository.
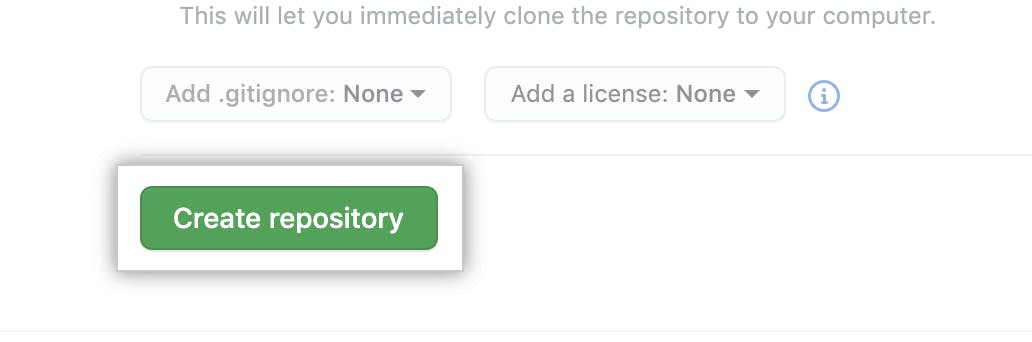
Congratulations! You've successfully created your first repository, and initialized it with a README file.
Basic Commands of Git:
There are lot's of command which a git user should know to handle the git , but In this article, we will learn few basics command of it. Let's start:
Git init : The git init command creates a new Git repository. It can be used to convert an existing, unversioned project to a Git repository or initialize a new, empty repository. Most other Git commands are not available outside of an initialized repository, so this is usually the first command you'll run in a new project.
Syntax
- $ git init

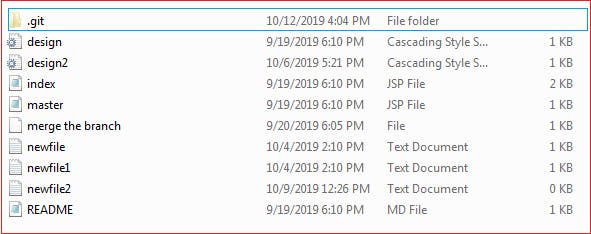
By default, git init will initialize the Git configuration to the .git subdirectory path. Git file in the directory will look like this in the folder which you want to push to the git.
Git clone: Git clone is a command for downloading existing source code from a remote repository (like Github, for example). In other words, Git clone basically makes an identical copy of the latest version of a project in a repository and saves it to your computer.

Syntax:
$ git clone <repository URL**>**
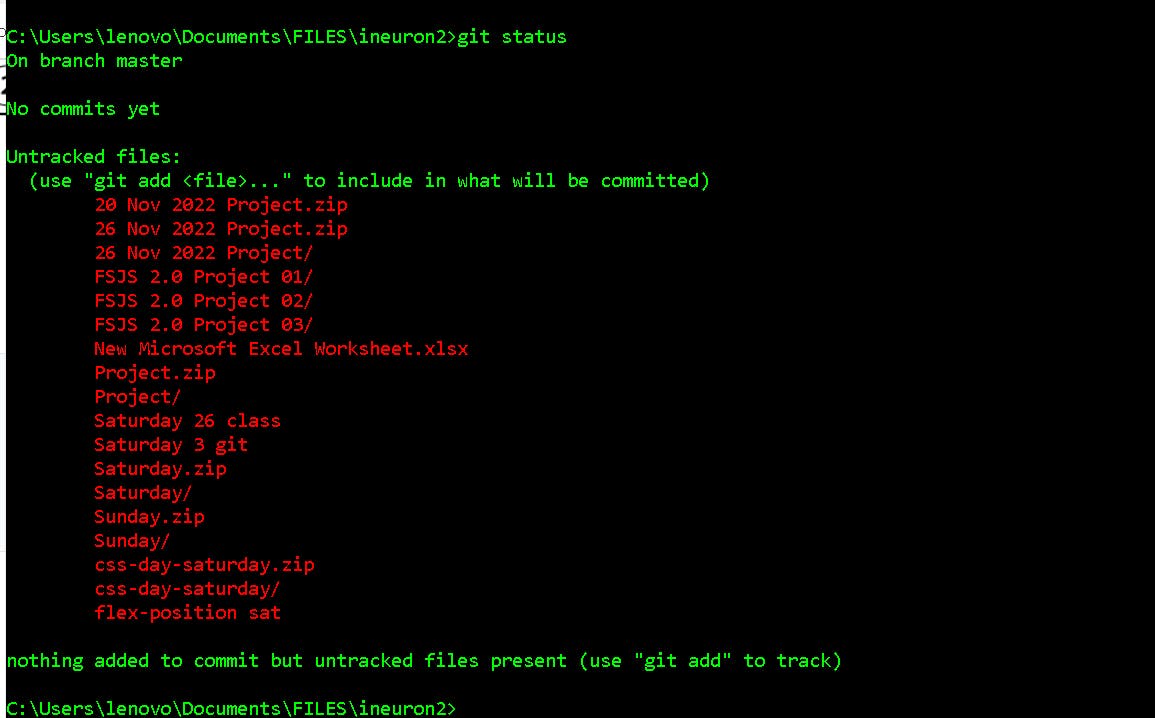
Git Status: The git status command is used to display the state of the repository and staging area. It allows us to see the tracked, untracked files and changes. This command will not show any commit records or information.
Mostly, it is used to display the state between Git Add
Syntax:
git status
Git add: The git add command is used to add file contents to the Index (Staging Area).This command updates the current content of the working tree to the staging area. It also prepares the staged content for the next commit. Every time we add or update any file in our project, it is required to forward updates to the staging area.
we can add all the file in once or can add the file on by one:
Syntax:
// it add all the files at once
git add
//it add the file which you want to add
git add file name


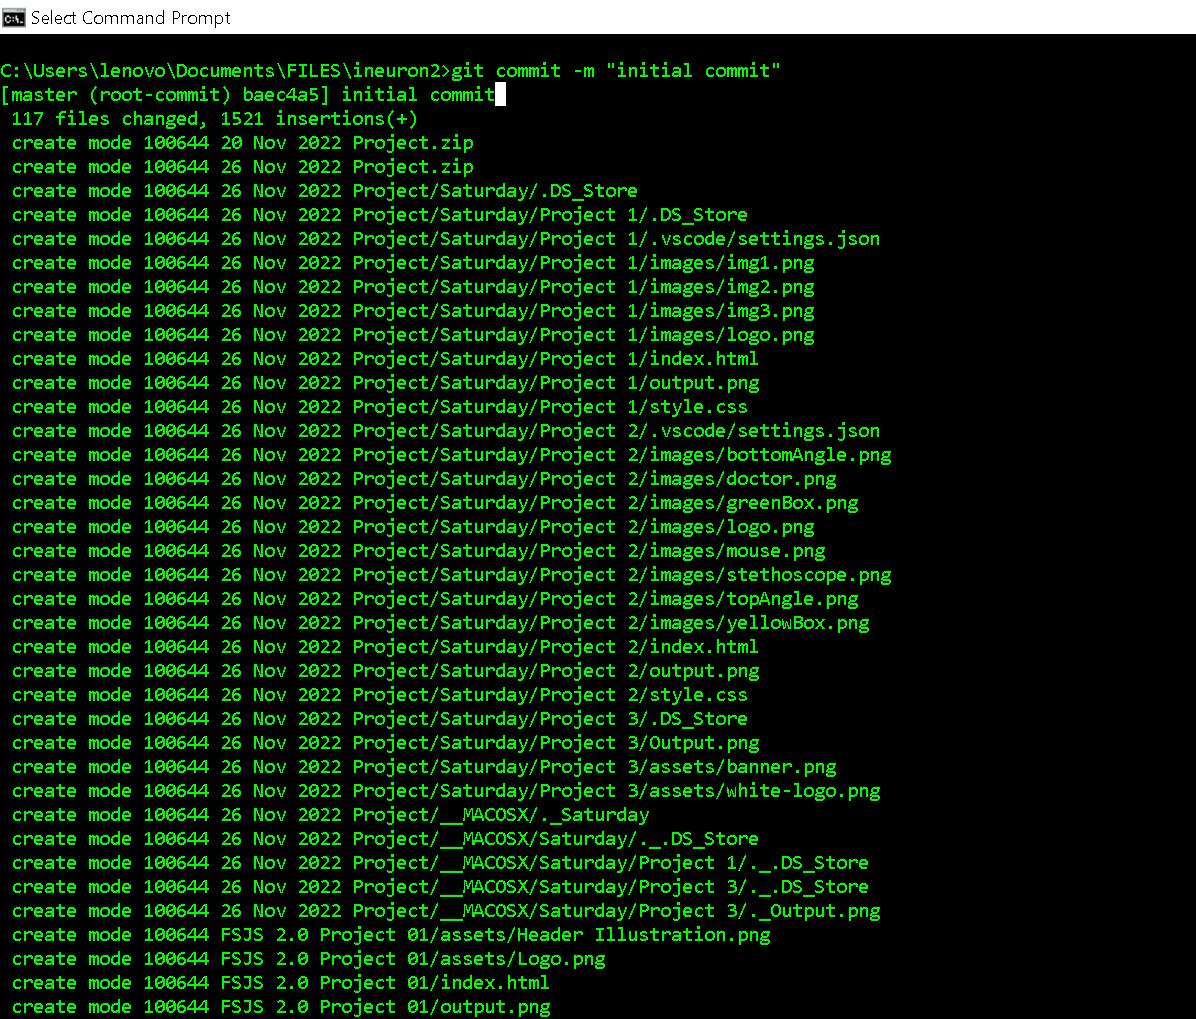
Git commit:It is used to record the changes in the repository. It is the next command after the git add. Every commit contains the index data and the commit message. Every commit forms a parent-child relationship. When we add a file in Git, it will take place in the staging area. A commit command is used to fetch updates from the staging area to the repository.
The commit command will commit the changes and generate a commit-id. The commit command without any argument will open the default text editor and ask for the commit message. We can specify our commit message in this text editor. It will run as follows:
Syntax:
git commit -m "message"
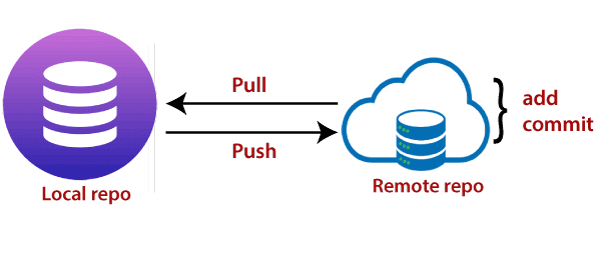
Git Push: The push term refers to upload local repository content to a remote repository. Pushing is an act of transfer commits from your local repository to a remote repository. Pushing is capable of overwriting changes; caution should be taken when pushing.
Syntax:
$ git push <option> [<Remote URL><branch name><refspec>...]
Git pull: The term pull is used to receive data from GitHub. It fetches and merges changes from the remote server to your working directory. The git pull command is used to pull a repository.

Syntax:
$ git pull <option> [<repository URL**><refspec>**...]
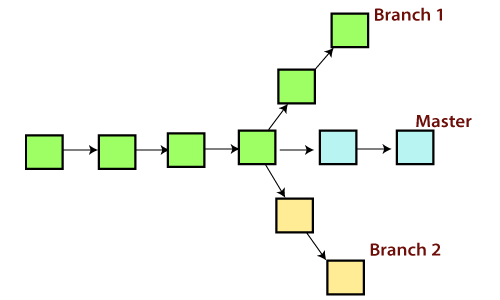
Git Branch: A branch in Git is simply a lightweight movable pointer to one of these commits. The default branch name in Git is master . As you start making commits, you're given a master branch that points to the last commit you made. Every time you commit, the master branch pointer moves forward automatically.
A branch is a version of the repository that diverges from the main working project. It is a feature available in most modern version control systems. A Git project can have more than one branch. These branches are a pointer to a snapshot of your changes. When you want to add a new feature or fix a bug, you spawn a new branch to summarize your changes. So, it is complex to merge the unstable code with the main code base and also facilitates you to clean up your future history before merging with the main branch.
Syntax:
$ git branch <branch name> //git branch for creating the branch
$ git branch --list
or //both the command will use for list the all branches.
$ git branch
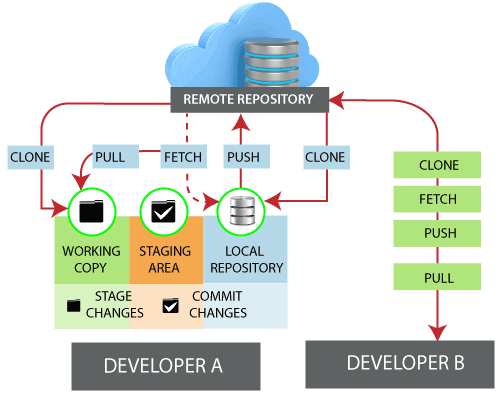
Git Remote: In Git, the term remote is concerned with the remote repository. It is a shared repository that all team members use to exchange their changes. A remote repository is stored on a code hosting service like an internal server, GitHub, Subversion, and more. In the case of a local repository, a remote typically does not provide a file tree of the project's current state; as an alternative, it only consists of the .git versioning data.
The developers can perform many operations with the remote server. These operations can be a clone, fetch, push, pull, and more. Consider the below image:
To check the configuration of the remote server, run the git remote command. The git remote command allows accessing the connection between remote and local. If you want to check in your system. You will enter the following command:
Synatax:
git remote //this command is used to show wheather the repository is in remote or not
Output: The given command is providing the remote name as the origin. Origin is the default name for the remote server, which is given by Git.

How to Push Code into Repository via cmd:
We will create the new repository via cmd by using the above commands only:
…or create a new repository on the command line
echo "# manager" >> README.md
git init
git add README.md
git commit -m "first commit"
git branch -M main
git remote add origin https://github.com/rakii8458/repository.git
git push -u origin main
…or push an existing repository from the command line
git remote add origin https://github.com/rakii8458/repository.git
git branch -M main
git push -u origin main